1. Introduction
Tableau is a popular analytics platform that gives you ways to work with complex business data.
With Tableau and their built-in visual best practices, you can explore data from different sources and connect your Businessmap workflow data to your business solution reports.
Note: For clients with old plans, the Tableau integration is available only for accounts, subscribed for the Businessmap Analytics.
To get started, download the Tableau Desktop (Paid or Public) version of the application.
Tableau has the concept of importing/connecting data via Web Connectors, so we have implemented a dedicated Kanbanize Web Connector that extracts data from Businessmap and makes it compatible with Tableau. As Businessmap already has a similar integration, but formatted for Power BI, the same model is used to export the data as script definition for PowerBI but converted for Tableau.
2. Get your Businessmap data and create a Tableau Worksheet
Step 1: Use the Advanced Search functionality in Businessmap to get data and export custom reports. You can use filters to narrow down your data as well as to configure it to hide/show certain properties and thus focus on a specific portion of data.
Note: When configuring your results you can select "Description" to display relevant content per card. The number of characters with spaces depends on the number of results you get in your report.
- If you get from 1 to 10 results (cards), the system displays 100000 characters from the description.
- if you get from 11 to 30 results (cards), the system displays up to 30000 characters.
-
from 31 to 100 cards - up to 10000 characters.
-
from 101 to 300 - up to 3000 characters.
-
from 301 to 1000 - up to 1000 characters.
-
from 1001 to 3000 - up to 300 characters.
-
above 3000 - up to 100 characters.
Important: When exporting data from multiple workflows or boards via the Advanced search, ensure that all column names are unique. Tableau does not distinguish between columns with identical names, which may result in data loss.
Step 2. Once you generate your report, proceed further and Save it. Give it a name, checkmark the Power BI query, and select "Save Filter".
Note: This Power BI query will be used as data input for the Tableau Web Connector.
Step 3. You will see the generated script from your search results. Copy the script to use it in the advanced query editor in Power BI.
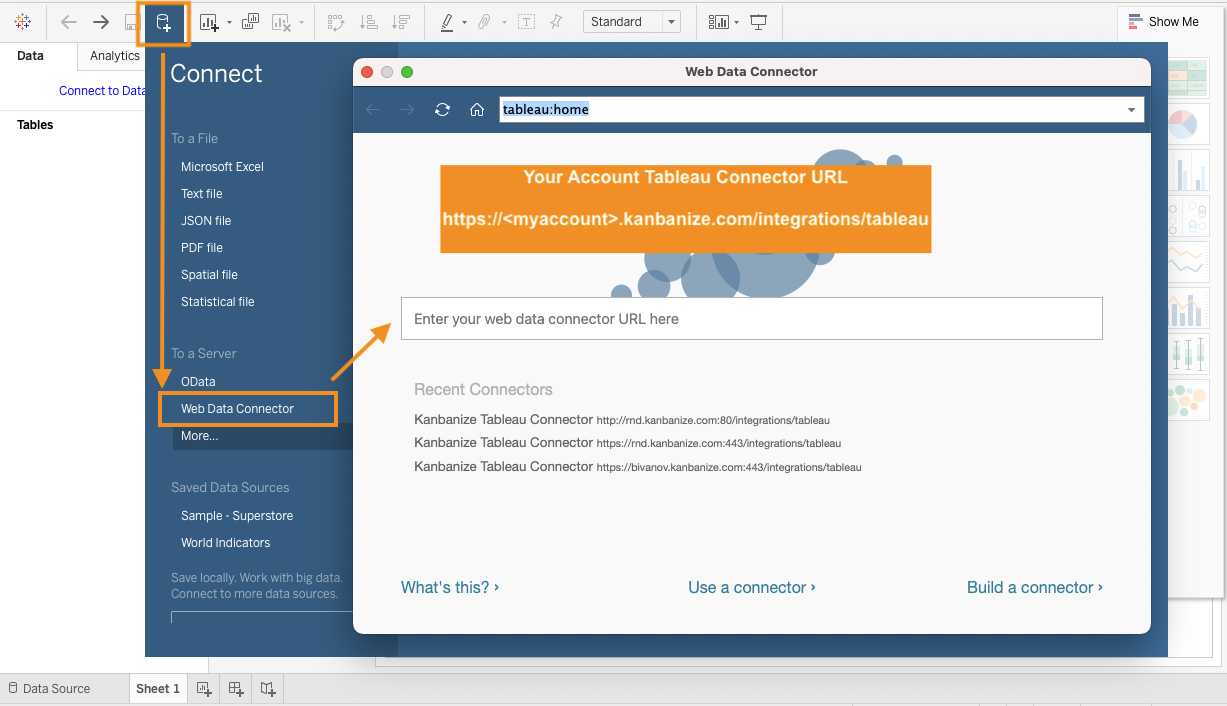
Step 4: Go to your Tableau Desktop and select the "+" to connect a new data resource.
From the list of options select "Web Data Connector"
Enter your Account Connector URL: https://<myaccount>.kanbanize.com/integrations/tableau

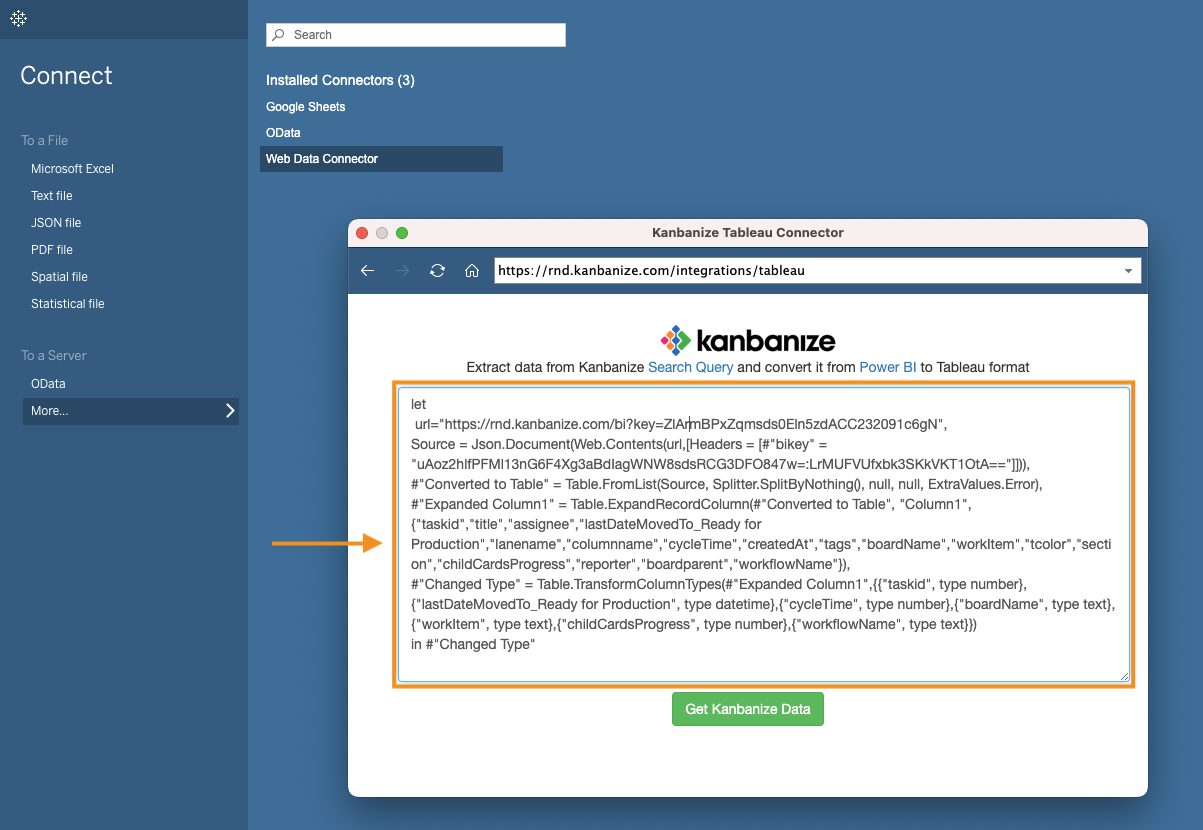
Step 5: Once you open the Connector Page, enter the Power BI script there:

When you paste the script, click the "Get Kanbanize Data" button.
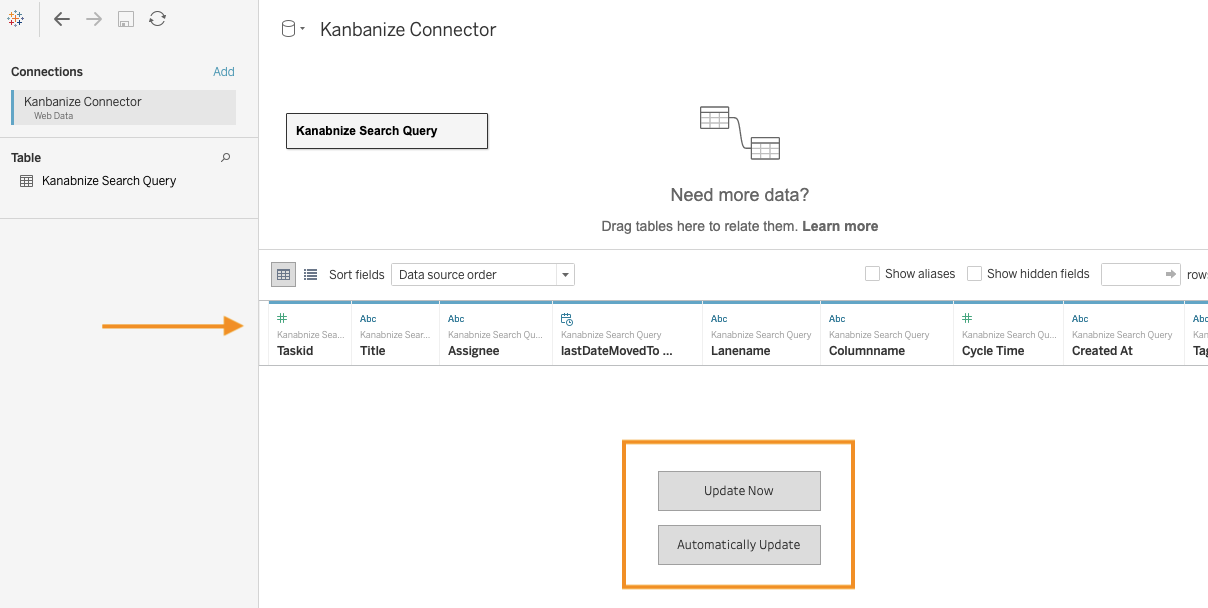
Step 6: The connector is preparing the table columns and types. This might take a couple of seconds. After the initialization is completed, you should be able to see the data structure.
Here you can define how to get the data via the "Update" buttons.

3. Build your reports
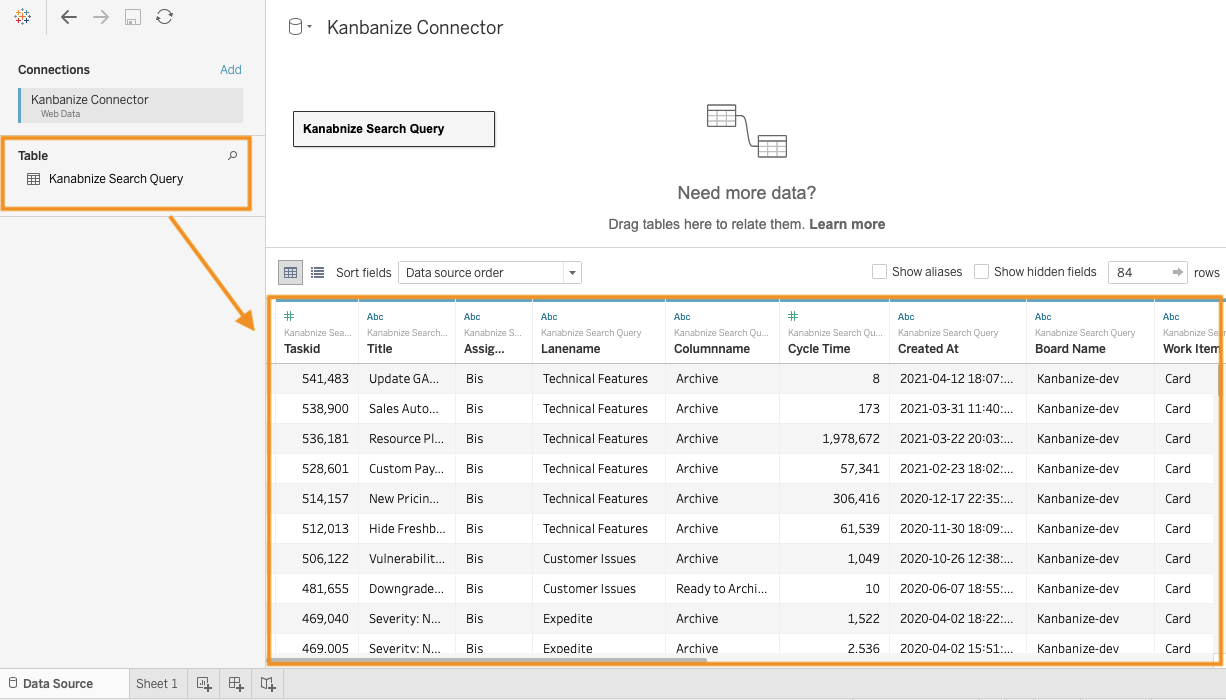
After setting up the Kanbanize Web Connector, you should have a ready-to-use data table with your search query results extracted from Businessmap.

Back at your Dashboard sheet using the Businessmap Search Query Data Source you can now build different charts and connect your Businessmap and Business Data for your custom Tableau dashboards and reports.
4. Visualize Your Tableau Report Directly in Your Businessmap Dashboard
Through the Tableau Reports widget, you can embed your Tableau reports in a Businessmap dashboard of your choice. To visualize your Tableau report, click the Share option and copy the link in the Share View window that opens.
Open the Businessmap dashboard you want to embed the report and click Add widget. Once you select the Tableau Reports widget, you will see a window where you need to specify which Tableau product you are using (Public of Cloud) and paste your link.
Click save to embed the report, rename it if you want, and you are all set.
