1. Sort Cards by selected fields
Product Release 7.3 brings another enhancement meant to facilitate the fine sorting of cards on your Kanban boards. We added the capability to easily define how your cards will be sorted within a column as required by your day-to-day processes. This will help you to organize your work into groups and prioritize cards, based on your use-case.
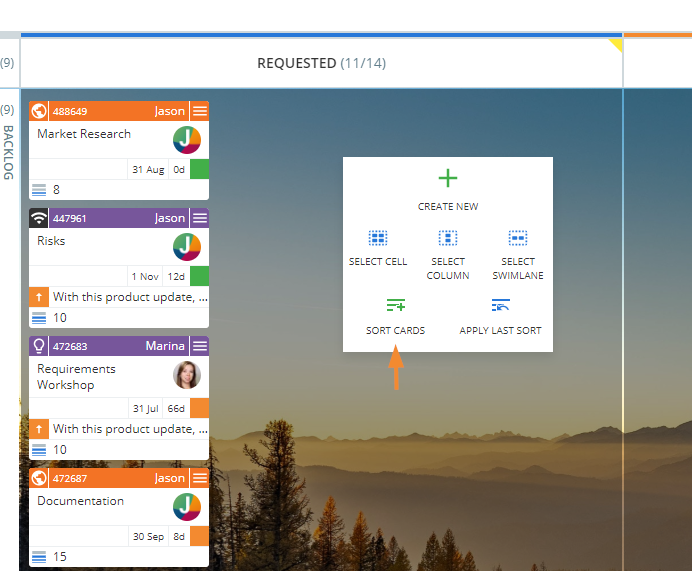
There is a built-in sorting option in every cell of your workflow. To sort out your cards, right-click within an empty area of a cell and select "Sort Cards".
You can sort your cards by different card fields: Assignee, Deadline, Size, Cycle time, Priority, Custom Card ID, etc. Moreover, the system allows you to apply multi-level sorting by adding several criteria simultaneously.
Select the Fields (1) that you want to have the cards sorted by and define their Order (2).
The system groups your cards and arranges them alphabetically or numerically in ascending or descending order.
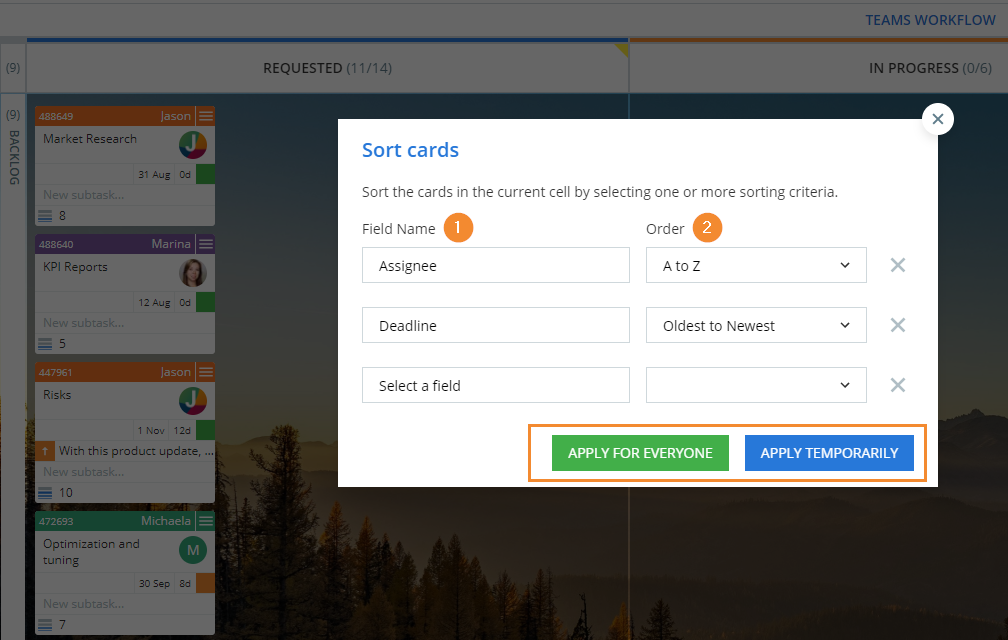
- When you select "Apply Temporarily", changes will be applied only for you.
A text message Sorted Temorarilrly appears at the top right corner of the column. Click on it to edit the sort criteria or to remove the sort and bring cards back in their original position.
You can also refresh the board to restore the cards' previous order. -
When you apply the sorting for "Everyone", cards will be reordered for all users on the board.
Important: The changes will be saved permanently and users will be able to reorder cards manually.
Notes:
- If the card fields have no values, the card goes at the bottom of the column.
- If your cards are already sorted and you add new cards, you will have to apply the sorting filter again in order to view them properly.
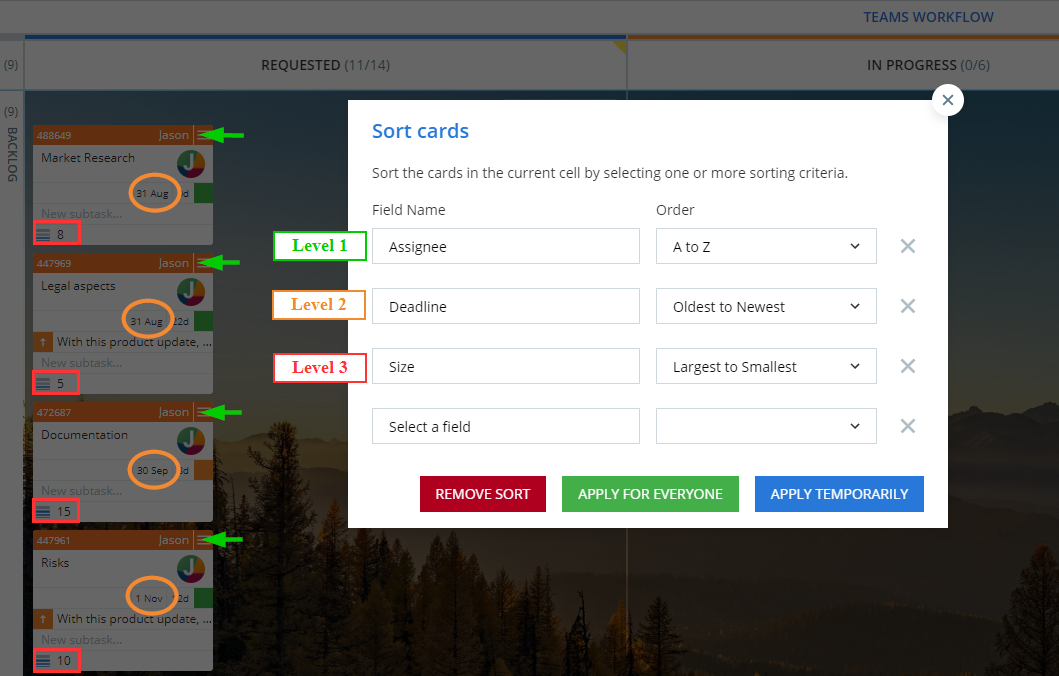
Multi-level sorting
When you apply multi-level sorting, the system classifies your cards by the first Field you selected (for example Assignee). This way, you will have all cards for each assignee grouped together in A to Z or Z to A order.
Then the system rearranges the cards in every group by the second field (for example Deadline). The order might be ascending or descending.
The third field (for example Size) applies to cards within the groups, only if some of the values in the previously selected fields match. For example, if two cards in the group have the same deadline, the system will reorder by the size only them.
2. Initiatives improvements
- The Card Zoom Switch allows you to toggle to one of four different views of the cards and Initiatives on the board: Large, Normal, Compact, and Bird eye view.
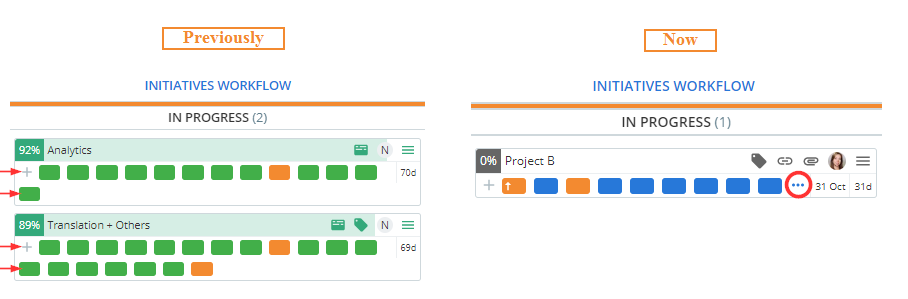
With this product update, if the "Normal" or the "Large" view is selected, all cards linked to the Initiatives get displayed on a single row for a more compact appearance. All icons that correspond to the Initiative properties are visible right above.
When the linked cards are more than the allowed first-row space, you have to click the three dots icon to visualize the rest of the linked cards.
Double click the icon to visualize the linked cards of all Initiatives on the Board with a single action.
-
With the "Large" view, the Initiative Title displays on a separate row and the icons that correspond to the item properties are visible right above for quick access.
Note: With this view, when the item has no Custom ID, the default system ID is displayed.
When you select "Normal" view, the Title is positioned next to the progress indicator icon. If it is too long the initiative properties icons are hidden. The Card ID is no longer visible. In this way, the title stands out in a more compact view of the Initiatives.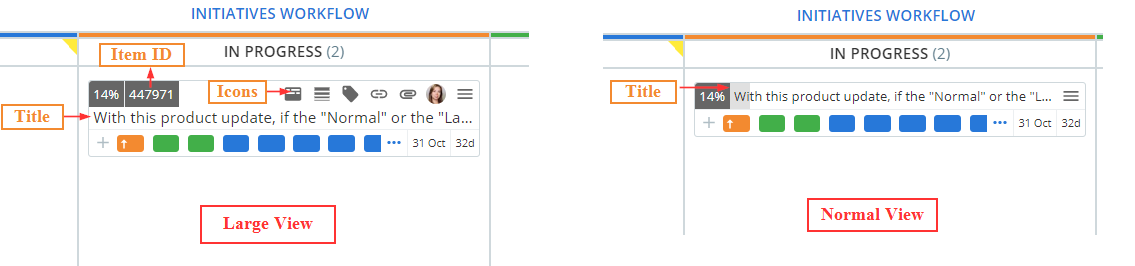
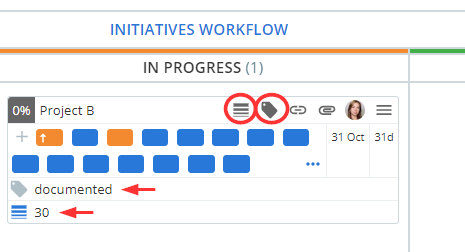
- When you click either the "Tag" or "Size" icon on an Initiative, the corresponding values become visible right below the row of linked cards. Click the respective value, if you want to change it.
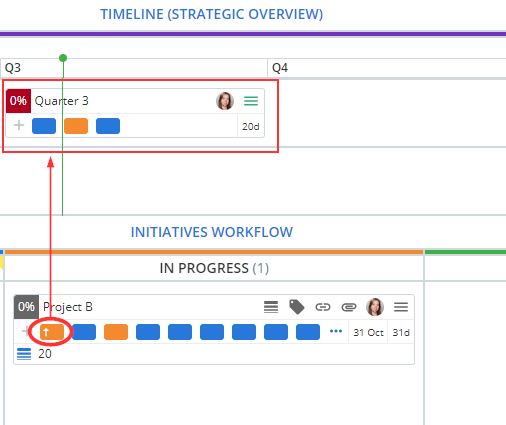
- Each child card linked to the Initiatives is represented by a colored rectangle. With this Release, parent cards become visible too. They are always positioned first in the row and an upward arrow makes each parent card stand out.
-
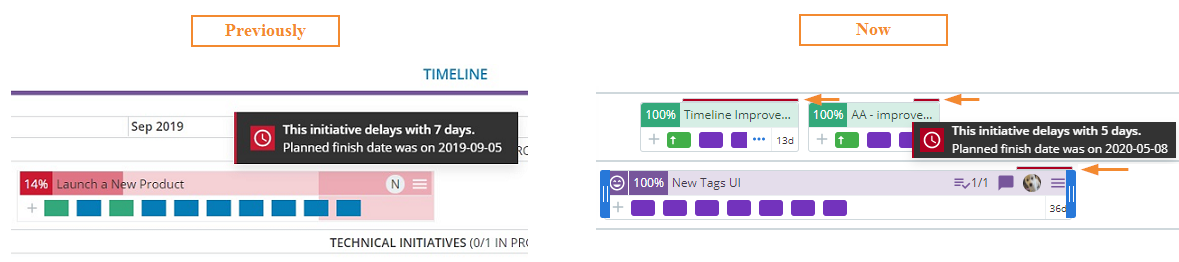
If a project is running late and the Initiative is behind the Planned end date, the system will mark it with a red line at the top. The days of delay tooltip appears on hover.
-
All tooltips of cards and Initiatives now include two additional properties: the Size value (if entered) and the Cumulative size value (if any).
Tooltips appear when you hold a cursor over:
- the progress icon of the Timeline initiatives
- the rectangles that represent linked child cards
- the representation of linked cards in Links Overview
3. Excel Import Improvements
With Product Update 7.3, the Excel import capabilities cover even more scenarios. Users are now able to perform the following actions:
-
Add new cards and Initiatives into multiple boards with a single importWhen formatting the Excel file, you need to add a column header “Board Id” and input the ID values of the respective boards. After the import, each card/initiative will be created in the corresponding board. If this column is not added or the Board ID values are not entered, the items will be created in the Board from which you execute the import.
Note: You can see your board ID as the final part of your URL in the browser address bar or when you hover on a Board name in the Dashboard.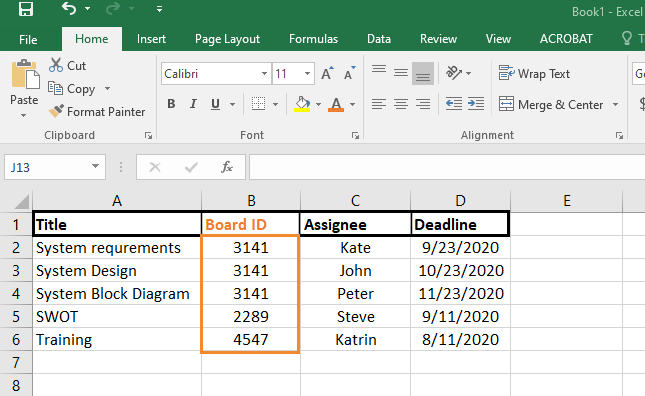
Similarly, you can use the name of the board, instead of the Board ID to add cards and initiatives into multiple boards. All you need to do is to create a column with a header "Board Name"
and enter the respective Board names. If this column is not added or the Board name is not entered, the items will be created in the Board from which you execute the import.
Note: If two boards in your Kanbanize account have the same name, you will get an error message during the import.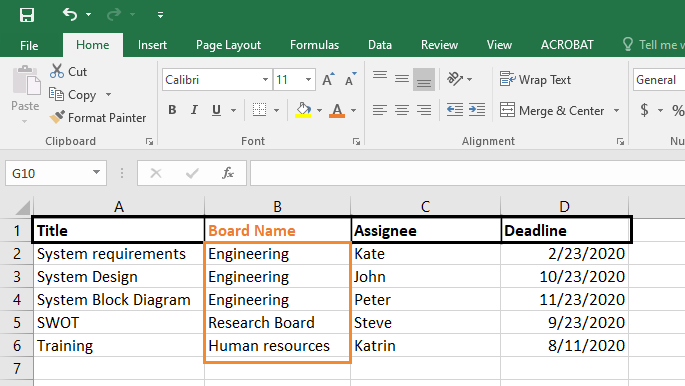
-
Add cards and Initiatives into different Workflows with a single import
You can format your Excel file and create a column with a header "Workflow name".
Once you enter the names of your Workflows and make the import, all work items will be distributed accordingly. If you additionally specify the column name in a dedicated Excel column, your work items will be created right there. Otherwise, they become available in your Board Backlog.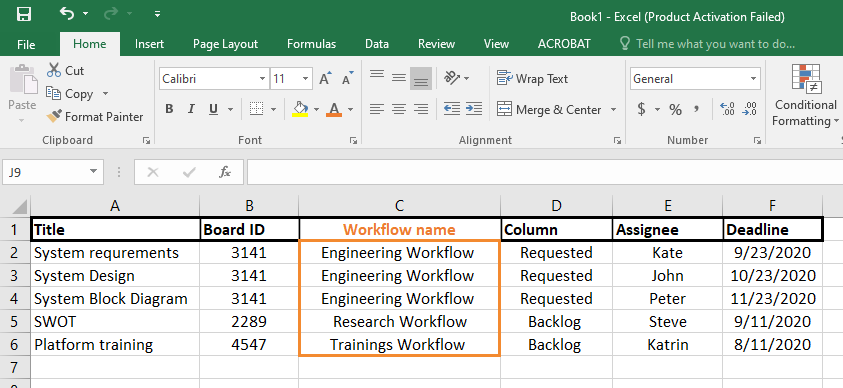
4. Search by keyword filter in the Comments tab
A new filtering option is added to the Comments tab of both cards and Initiatives.
Type in a keyword string to display only comments that contain your input. All others will be hidden.
To remove the filter, delete the keyword. 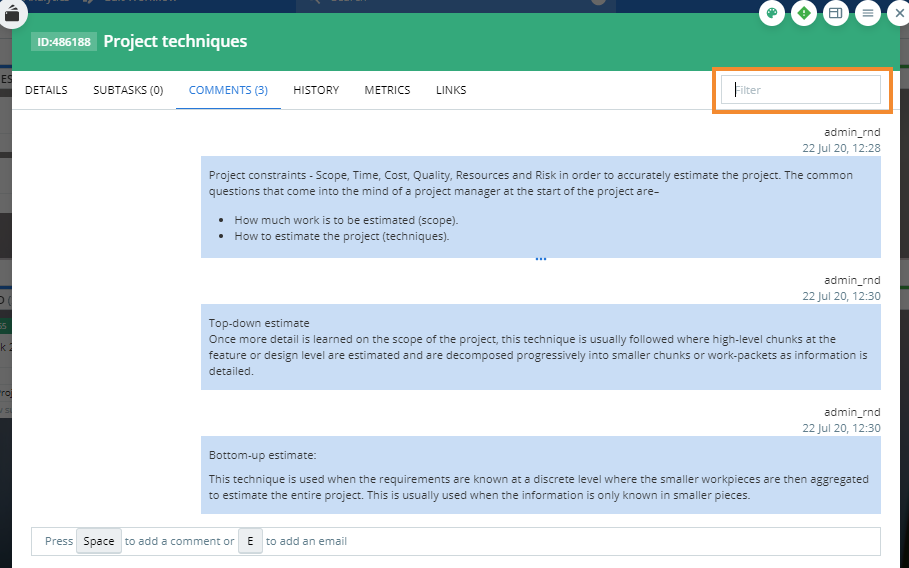
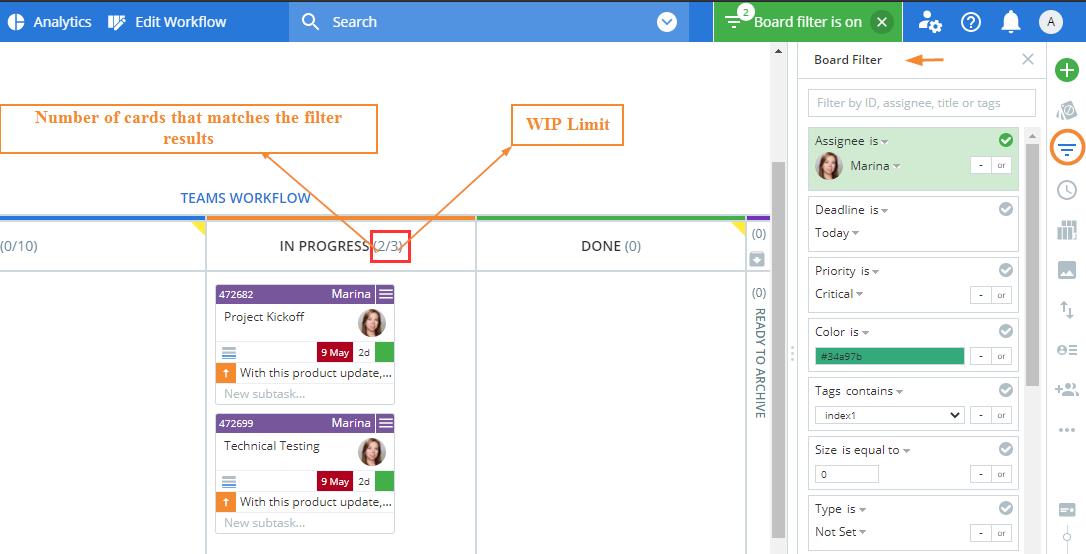
5. Board FIlter improvement
With this release, the number in the column headers reflects the exact number of search filter results.
This will help you to easily see the total number of cards that match your input in each and every stage of the workflow, even if the column/lane is collapsed. The "Work in Progress" limits remain unchanged.
6. New Rich-text editor
It becomes available across the entire product, so you can use it every time you need to enter some text. Also, we've added markdown support for simple text formatting.
Note that the new editor is not available for users on Internet Explorer.
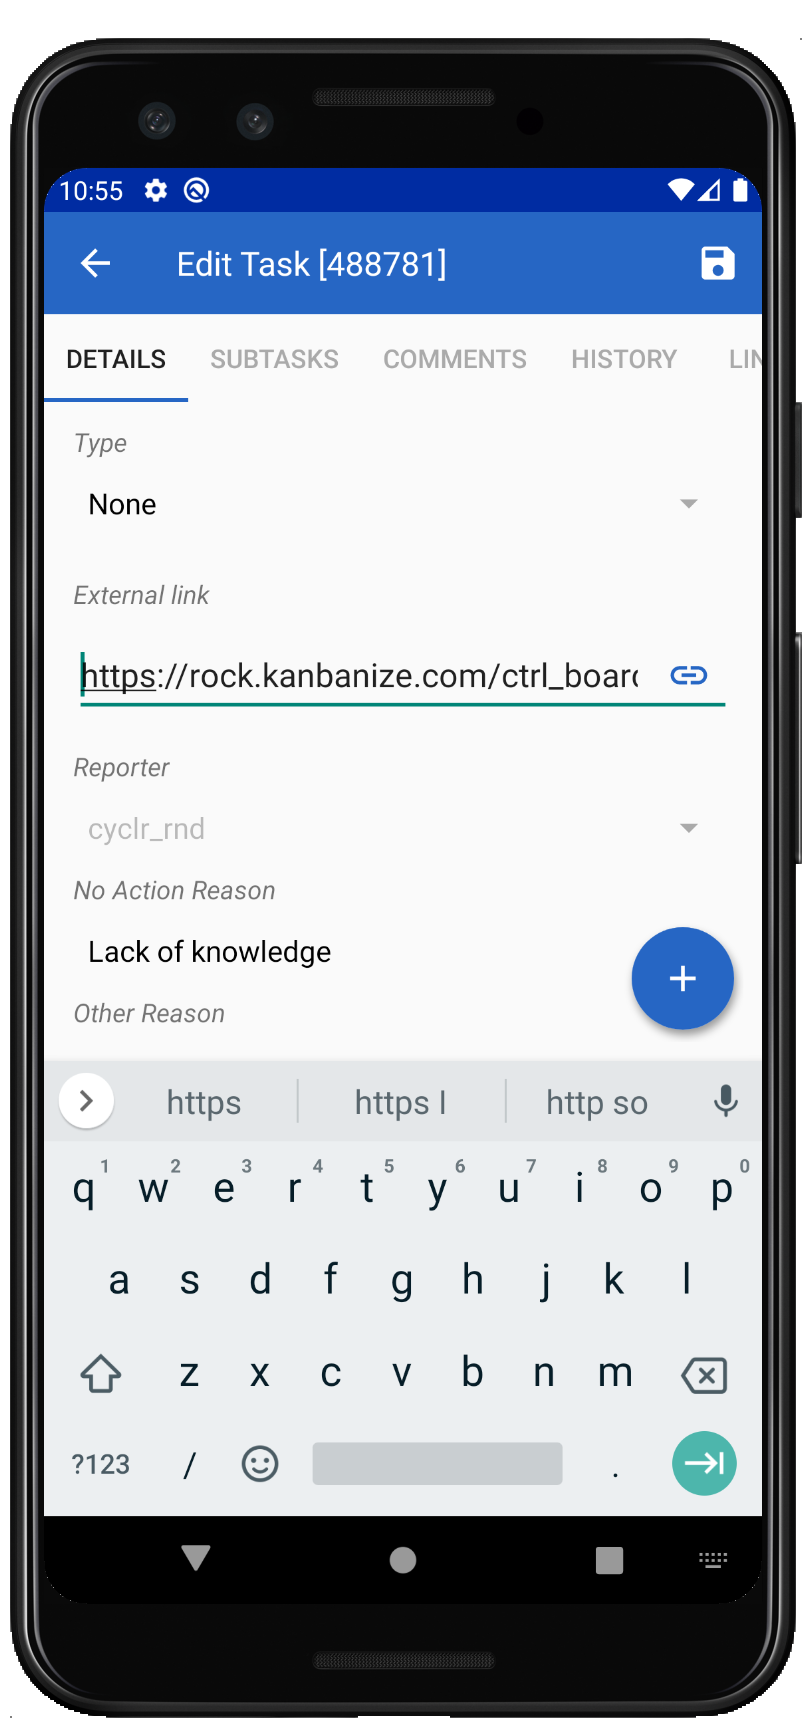
7. Mobile Improvements - Android and iOS
- The external link property was added to card details so you can now add, edit and open external links from card details.
- Tapping on a hyperlink in the card description now opens it in the browser instead of selecting the text.